To simulate writing, you would require an external MQTT client to send the messages such as http://mqtt-explorer.com/. In this short annex we’ll quickly show you how to use and configure an MQTT client which includes the topics you have to use to read and write and the format of the data. We will use MQTT Explorer as an example but you can use whichever client you prefer.
Configuring the MQTT connection
- Install MQTT Explorer (or other client) from http://mqtt-explorer.com/
- Once installed, open it and create a new connection where:
- As Protocol select mqtt://
- As Host type your Edge Device’s IP address (remember you can get this info from the General Info card in Barbara Platform)
- As Port, User and Password, type the values you assigned in the Secrets you configured when installing the MQTT Broker, which in this document are:
| NAME | VALUE |
| BROKER_MQTT_PORT | 8883 |
| BROKER_MQTT_USER | user |
| BROKER_MQTT_PASSWORD | password |

- Click then in SAVE and CONNECT buttons.
Reading Data from the Data Simulator
In order to read data coming from the Industrial Data Simulator, you have to subscribe your MQTT client to the appropriate MQTT topic. That topic is the one you defined as the “DUMMY_MQTT_PUB_TOPIC” secret when you installed the Data Simulator app. In this document this topic is the following one:
| NAME | VALUE |
| DUMMY_MQTT_PUB_TOPIC | MyEdgeDevice/read |
The structure of the data you will read will have the following format
{
"data":{
       "testVariable":7.585514896755415,
       "testVariable2":9.429777613595428
       },
"deviceDisplayName":"testDevice",
"error":false,
"errorDescription":"",
"timestamp":"2023-02-23T09:02:30"
}
Where:
deviceDisplayName: the name of the simulated device(s) you defined in the appconfig file of the Industrial Data Simulator. In this document’s example, we defined 2 devices: testDevice and testDevice2 so this value will be either one or the otherdata: is an array with as many variables as you defined in the appconfig file of the Industrial Data Simulator. In this document’s example we defined 2 variables per device so for testDevice they would be testVariable and testVariable2. The value of this 2 variables is randomly generated by the Data SimulatorerroranderrorDescriptionwould contain information in case an error in the Simulator occurs. If not, error would set to false and errorDescription would be emptytimestampis a temporal reference of when data has been generated so you can use this field to order data in a time series database
Writing Data to the Data Simulator
- In the “Publish” section of the MQTT Explorer you have to type the topic you previously configured in the DUMMY_MQTT_SUB_TOPIC secret when configuring the Data Simulator (in our example, this topic is “MyEdgeDevice/write”)
- From that moment on you can send your MQTT messages that will be received by the Industrial Data Simulator. The format of the data is as follows
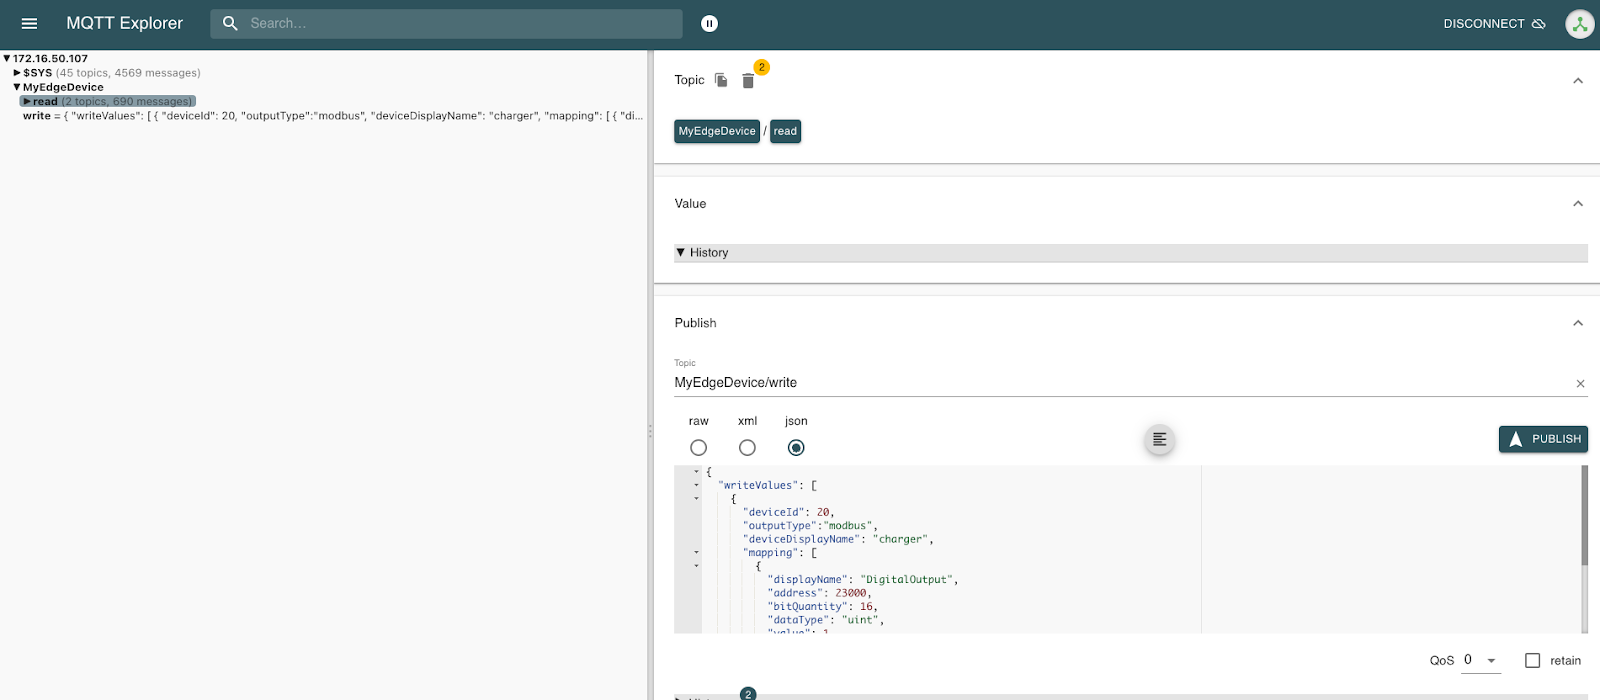
{
  "writeValues": [
    {
      "deviceId": 20,
      "outputType":"modbus",
      "deviceDisplayName": "charger",
      "mapping": [
        {
          "displayName": "DigitalOutput",
          "address": 23000,
          "bitQuantity": 16,
          "dataType": "uint",
          "value": 1,
          "registerType": "holding"
        }
      ]
    }
  ]
}
Notice that the values are just examples, you can vary them to send different data to the Simulator
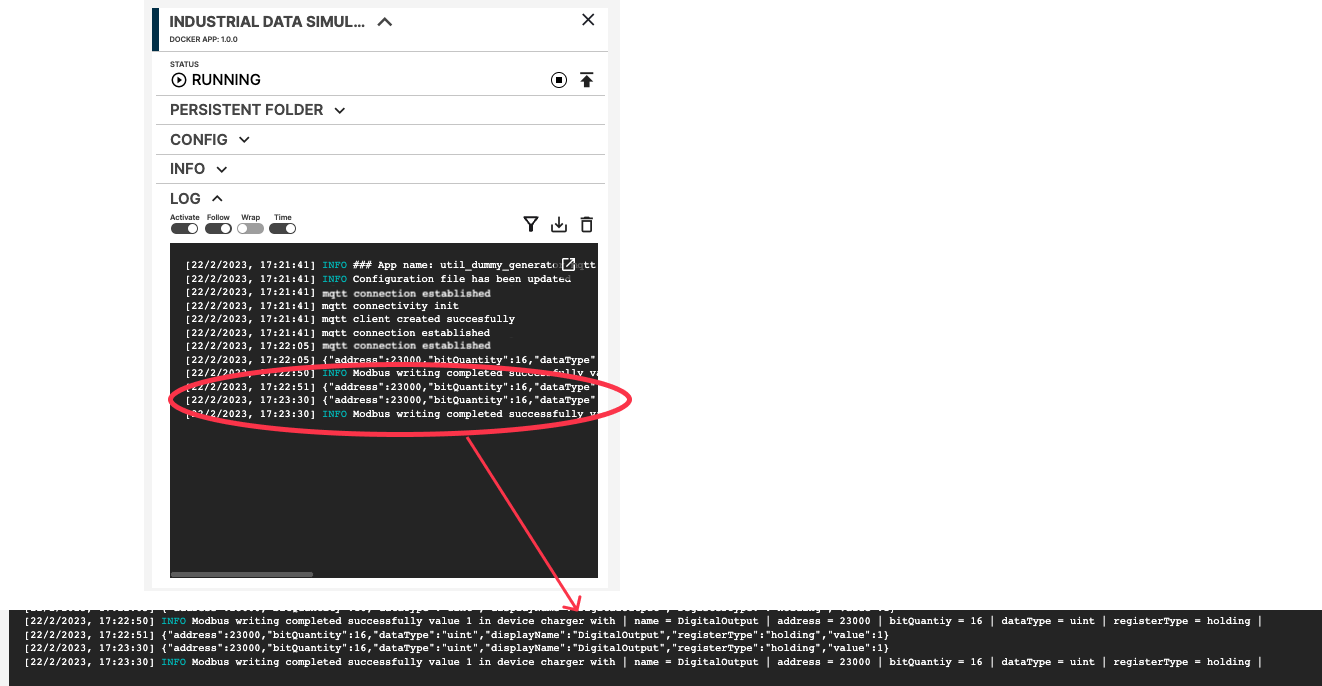
- If the message is correctly published, you should see the data you sent in the Data Simulator logs section